

All you need to get up and running ↓
Advanced Setup - Optional ways to personalise and get more from your funnel ↓
Not happy with the course you're currently promoting? Looking for a new offer ↓
Using Your Own Domain Name With The Funnel
How to Connect Your Domain to Systeme.io
This guide shows you how to connect your root domain to Systeme.io.
You Will Need
- A domain registered with a provider outside of Systeme.io
- A Systeme.io account
- A domain name can only be used for one website. If the root domain you want to connect to Systeme.io is already being used for another website, it will no longer be available for that website once you connect it to Systeme.io.
Step 1: In Your Systeme.io Account
1.1. Open Your Custom Domain Settings
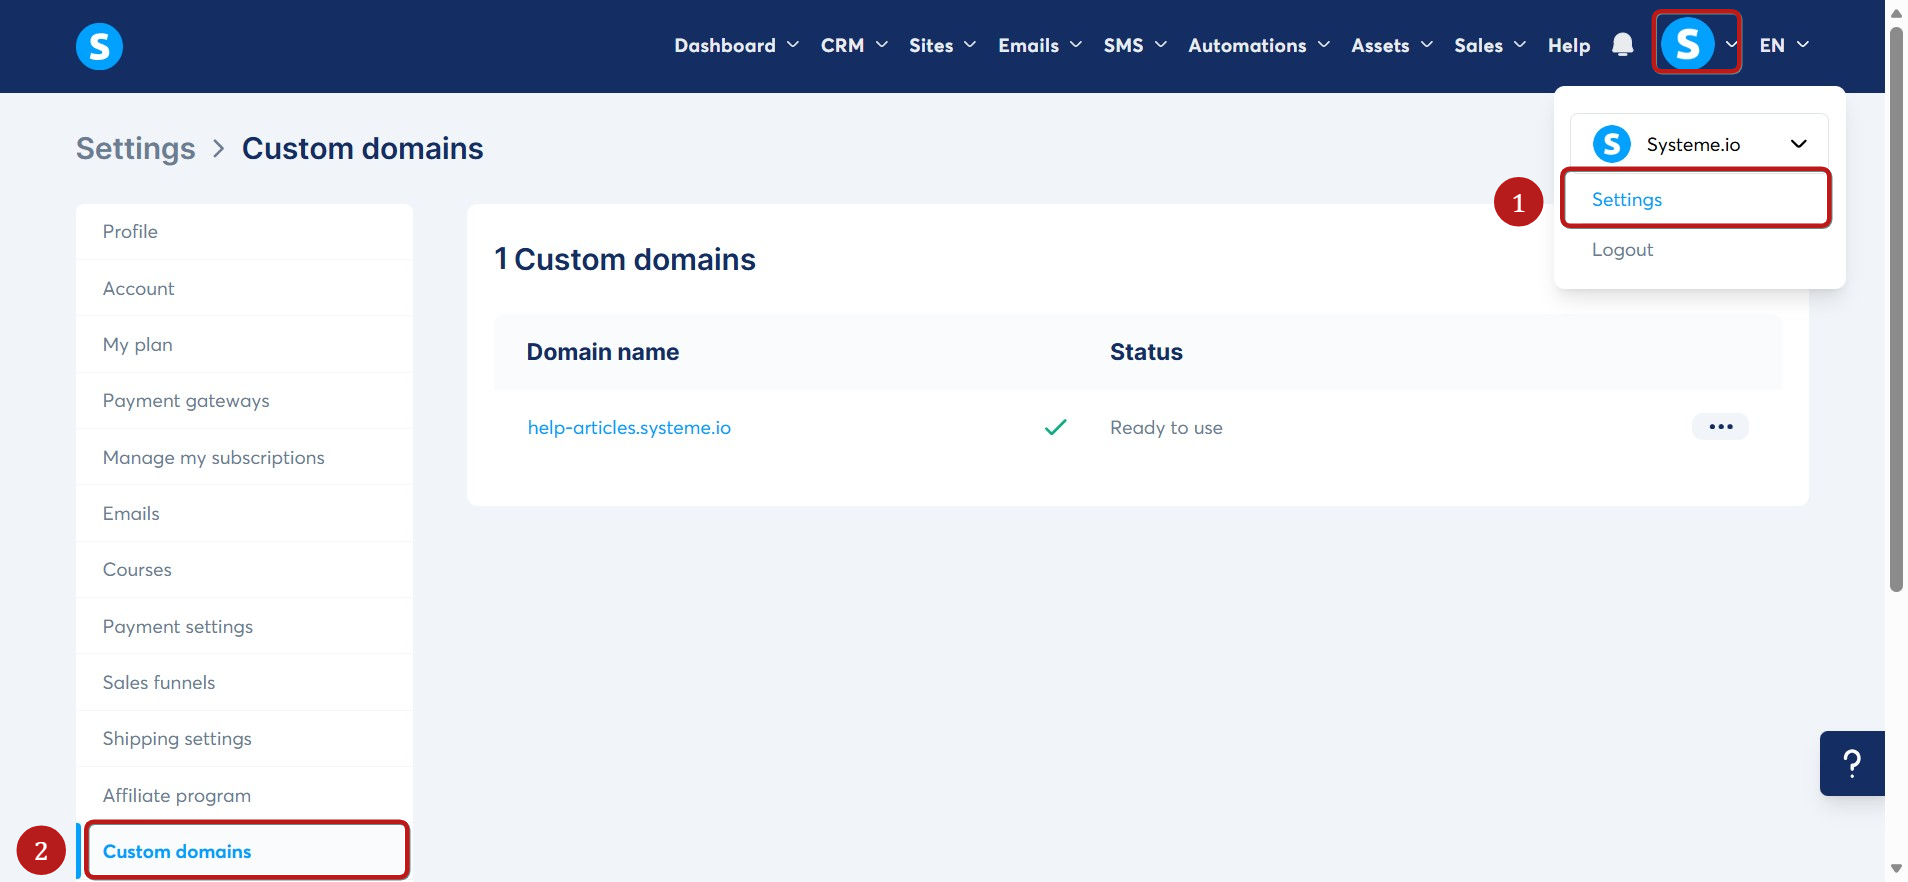
Click your profile picture, then select Settings (1), followed by Custom Domain (2).
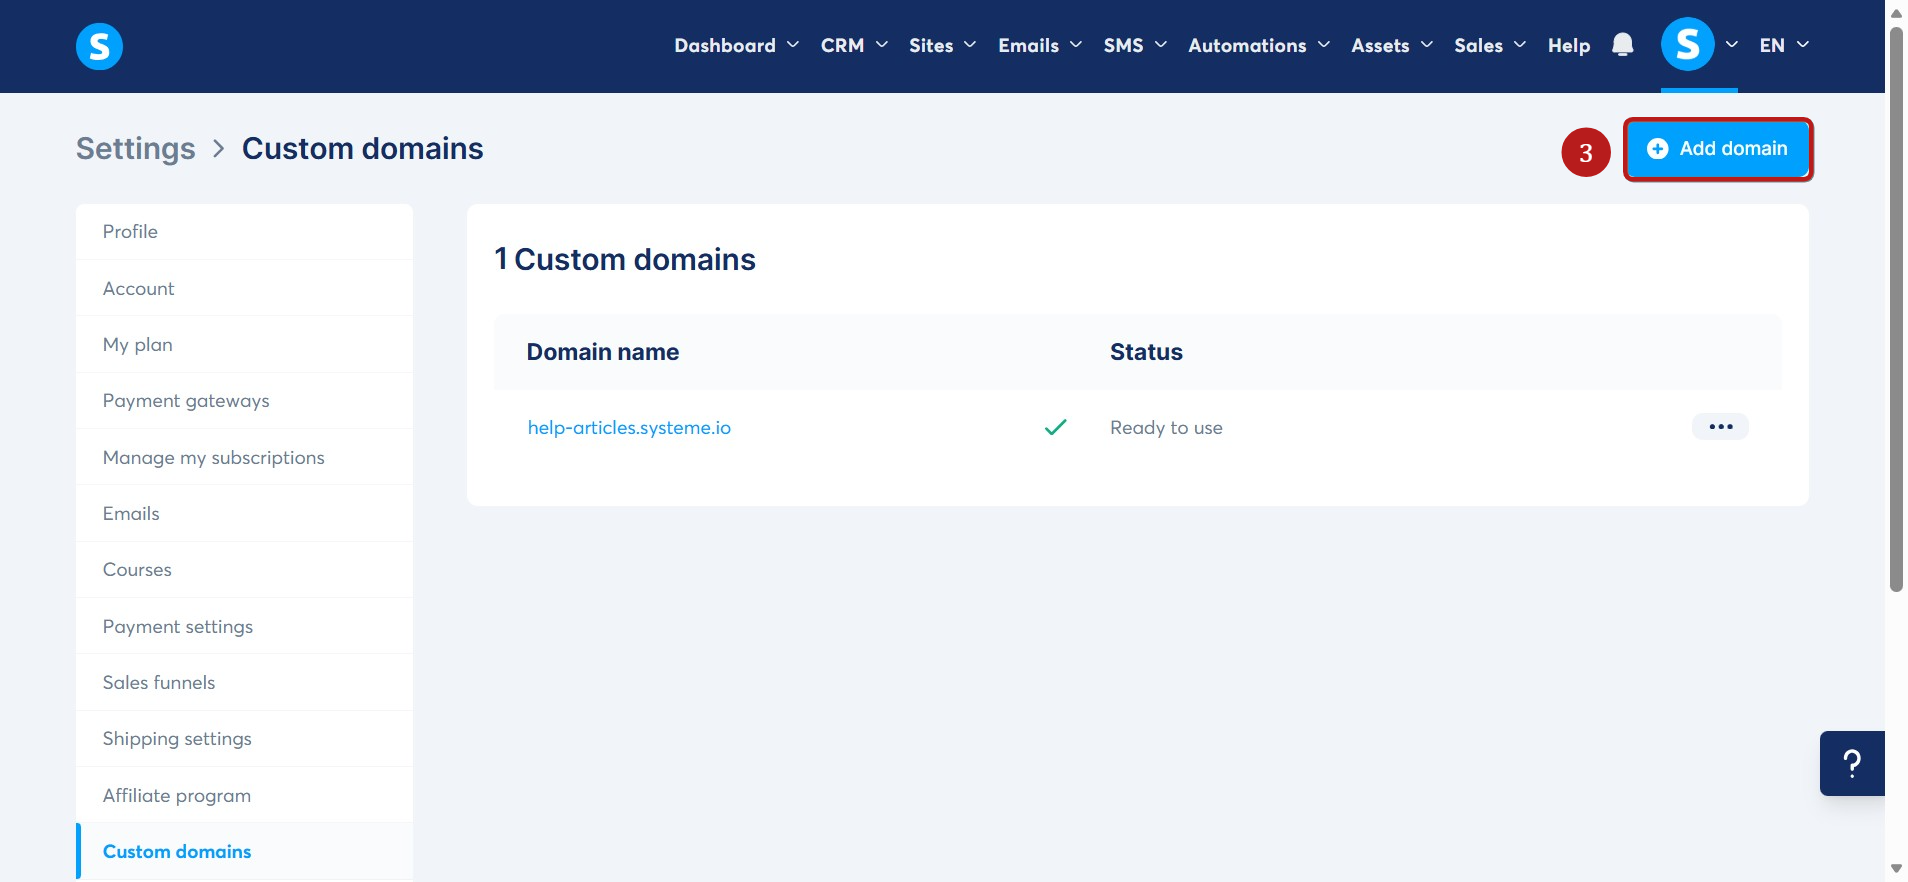
Then click Add domain (3).
1.2. Enter Your Domain
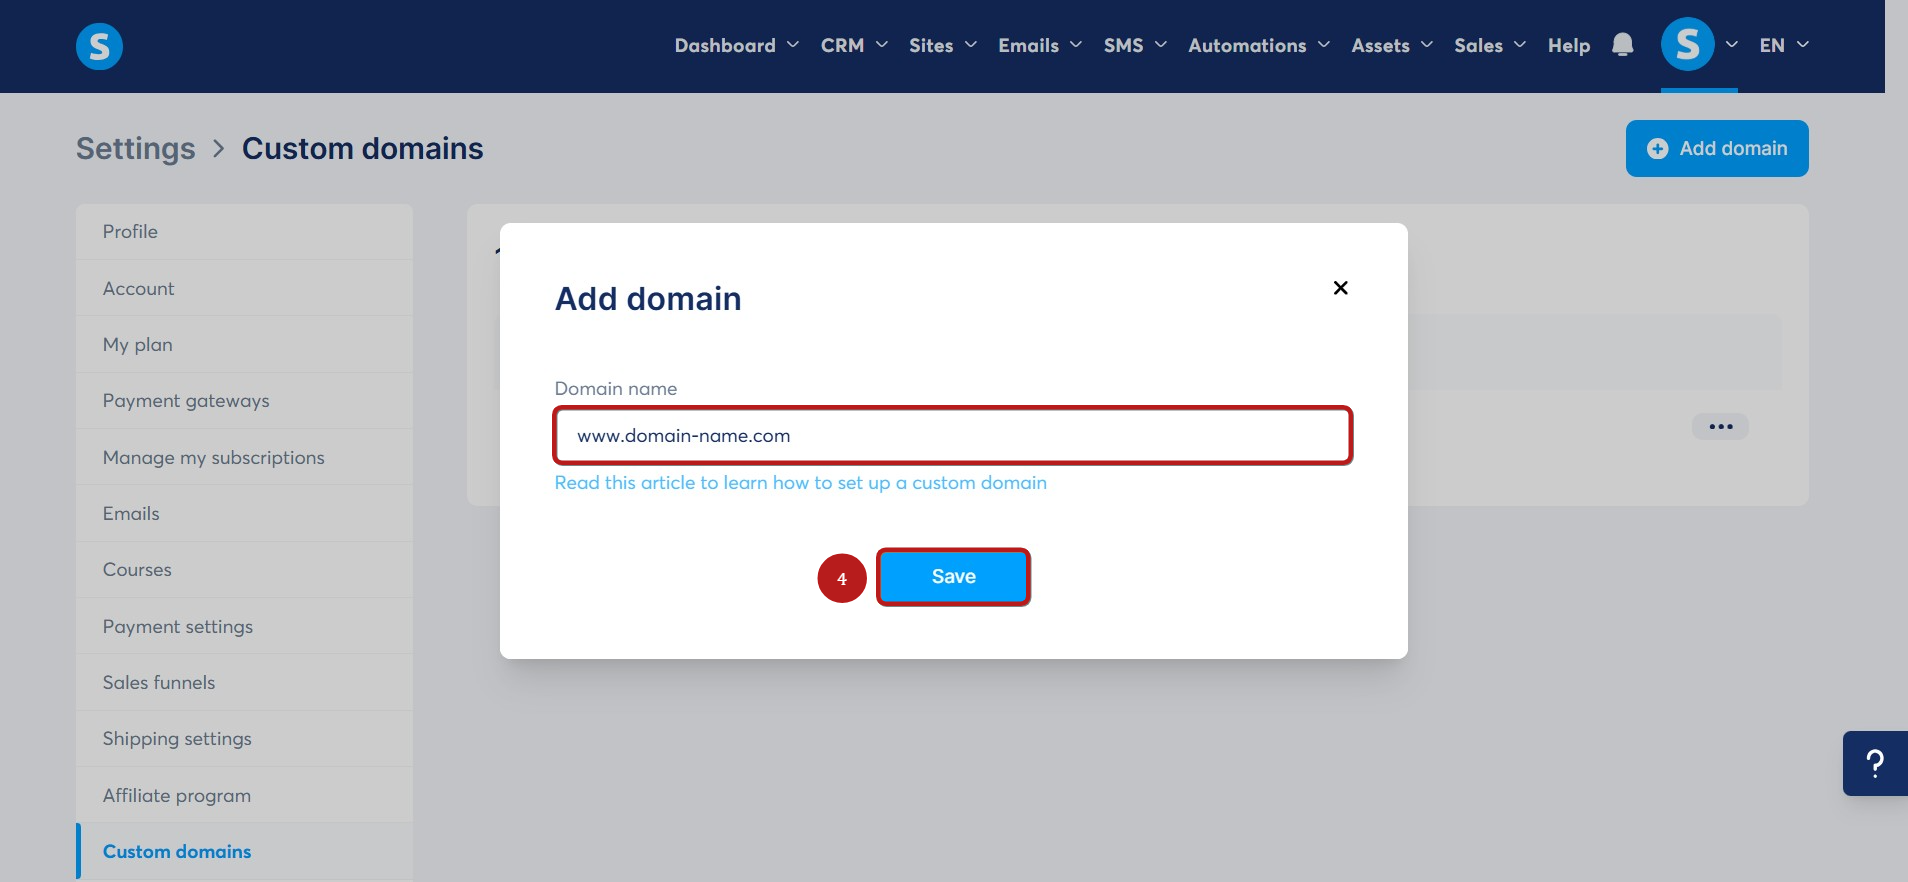
In the popup that appears, enter your domain name starting with www. For example: www.domain-name.com.
Once you've entered your domain, click Save (4).
1.3. Copy the CNAME Records
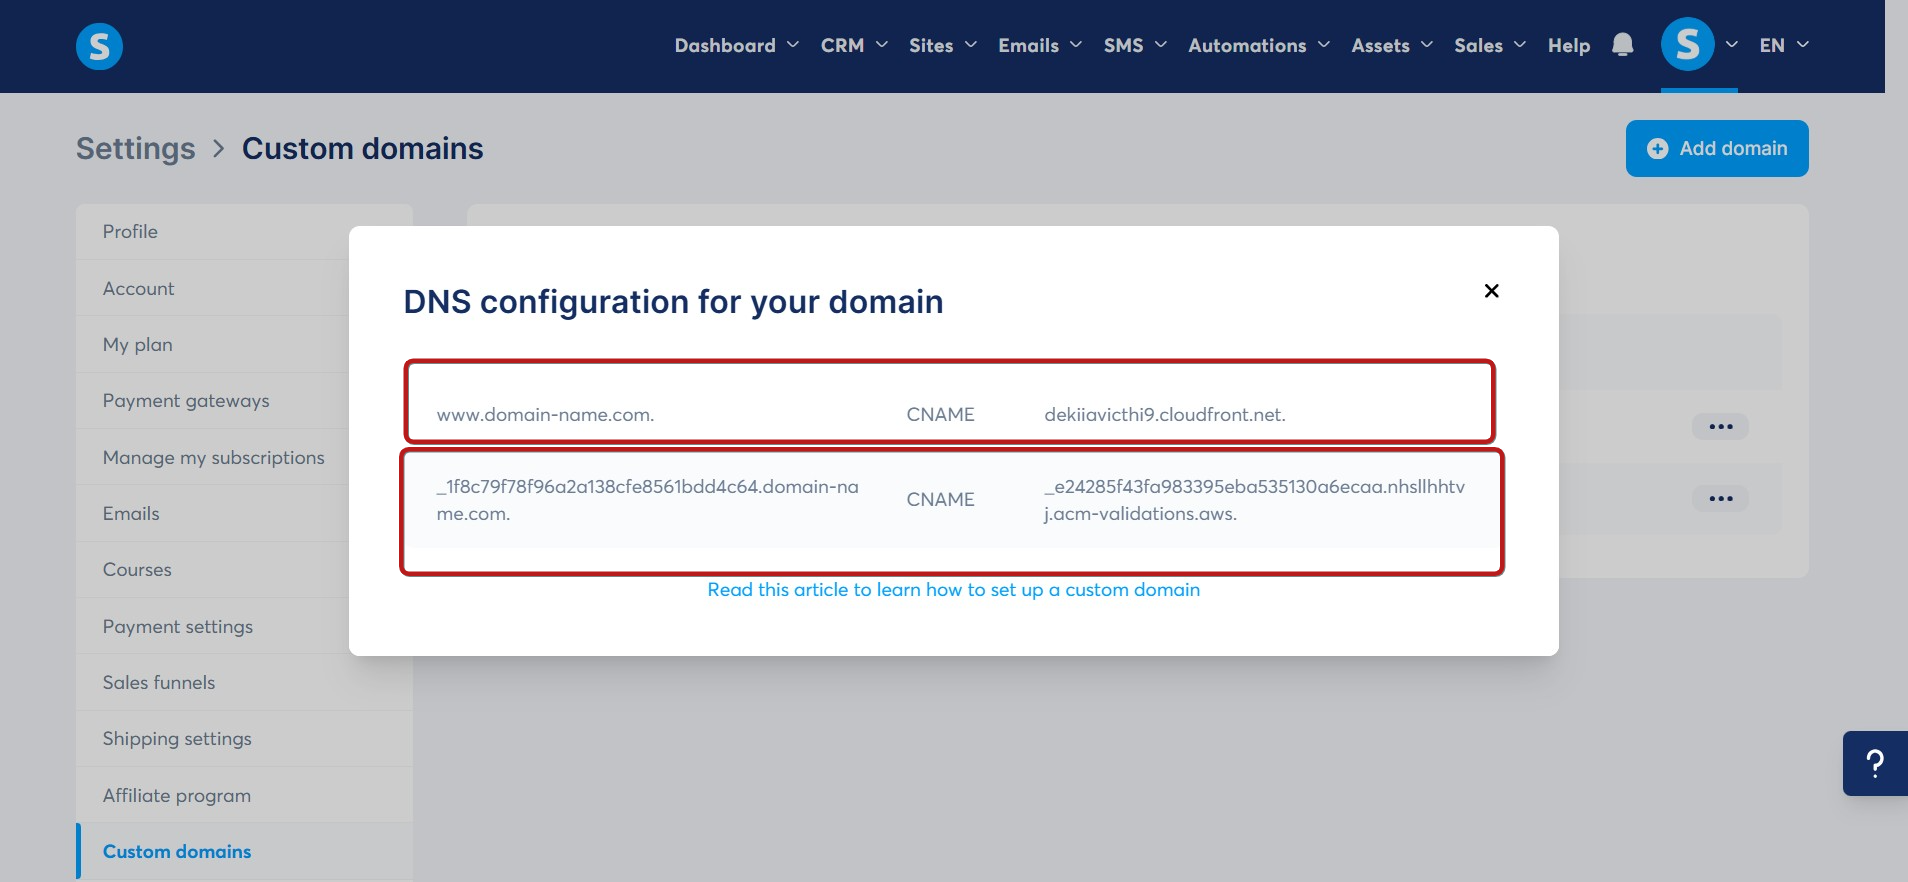
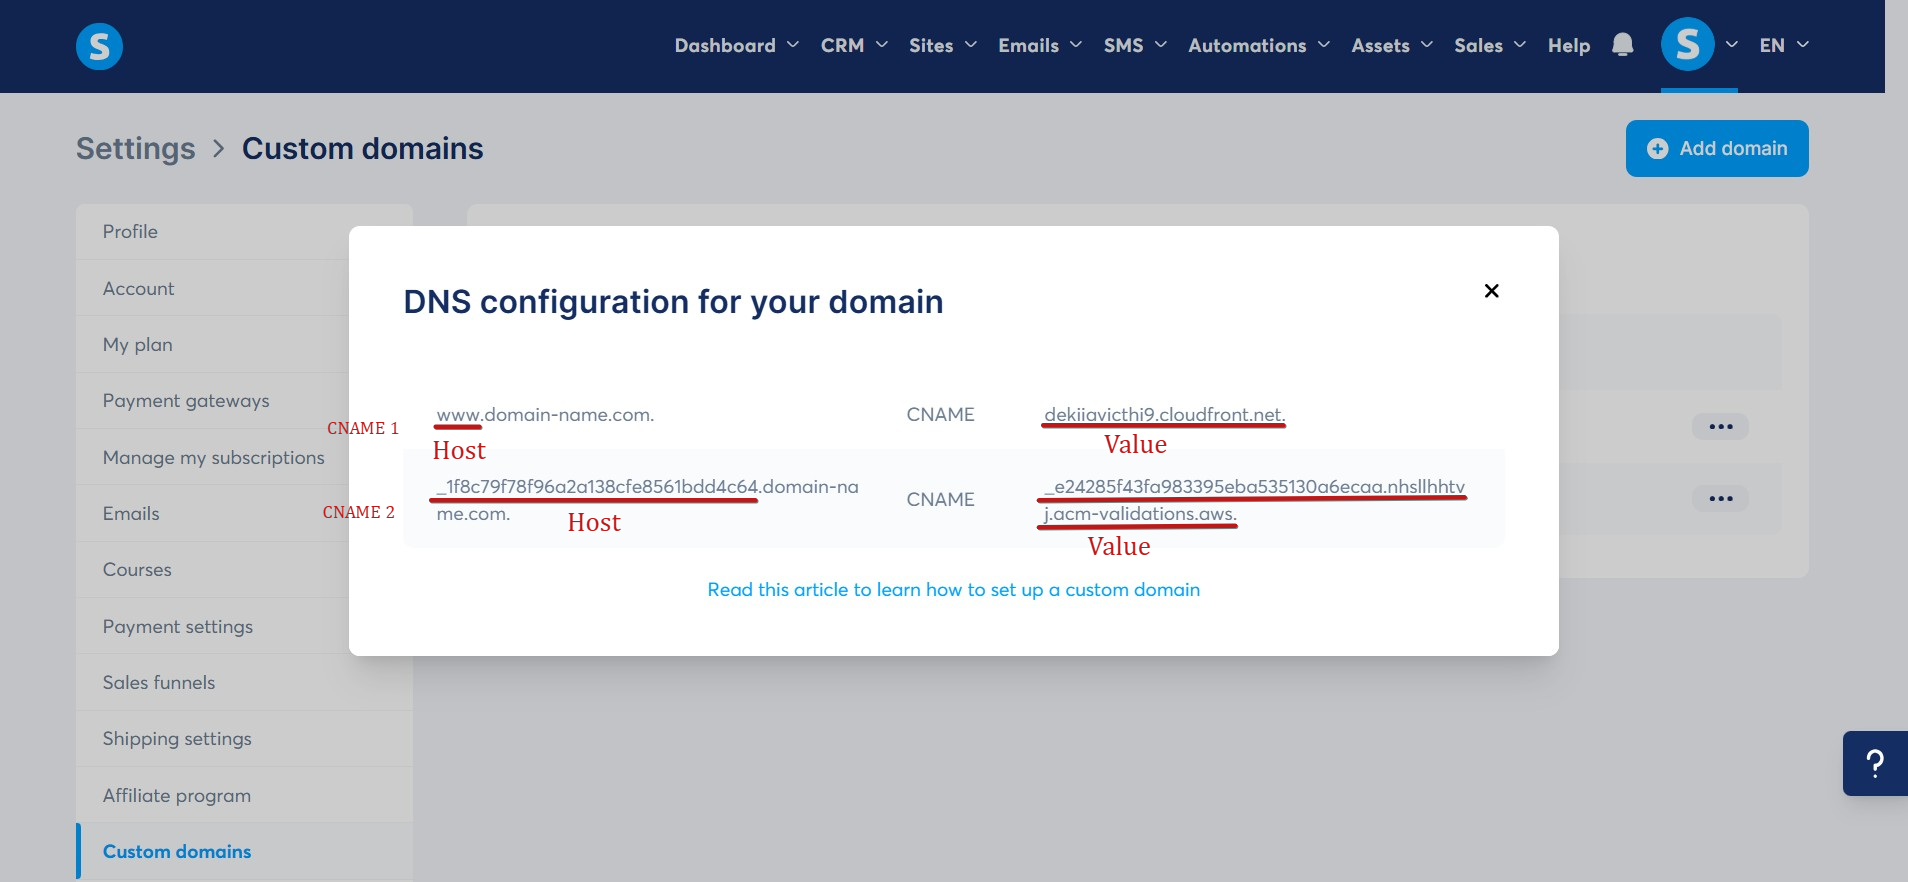
After your domain has been added and saved, another popup will appear showing two CNAME records. These records need to be added to your domain host's DNS settings in order to connect your domain.
Step 2: In Your Domain Hosting Account
Log into the account where your domain is hosted and add the two CNAME records shown in the popup.
If your domain provider is listed below, click the relevant link for instructions on creating your CNAME records:
- If you use another web hosting provider and cannot find your DNS settings, contact their support team for assistance.
- Some domain providers, such as Hover.com, do not accept dots at the end of DNS record values. If your domain keeps losing its “Ready to use” status or you experience connection problems, this could be the reason. You can also contact your domain provider to confirm whether this applies to your DNS settings.
2.1. Open Your DNS Settings
Once you're logged into your domain hosting provider, go to your DNS zone and select the option to create new CNAME records.
2.2. Add the Two CNAME Records
Create two new CNAME records in your DNS zone using the values displayed in Systeme.io.
First CNAME
- Name (Host): www
- Target (Value): dekiiavicthi9.cloudfront.net.
Second CNAME
- Name (Host): _1f8c79f78f96a2a138cfe8561bdd4c64
- Target (Value): _e24285f43fa983395eba535130a6ecaa.nhsllhhtvj.acm-validations.aws.
The image below shows an example of the information you need to add to your DNS zone:
- DNS records can take between 24 and 48 hours to fully propagate.
- Sometimes your domain host may not be able to save your CNAME records because they conflict with another DNS record. If this happens, contact your hosting provider to identify the conflicting record and ask whether it is safe to remove it.
Step 3 - Point Your Affiliate Course Promoter Funnel To Your Own Custom Domain
To use your own custom domain name with your funnel, such as YOURNAME.com or YOURCOMPANY.com, you will need to change the settings for the funnel.
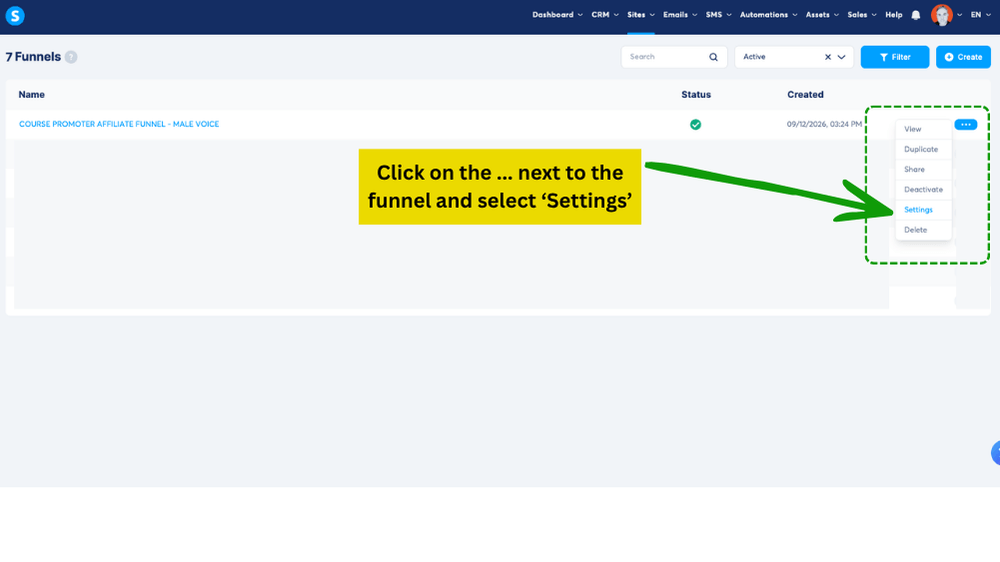
Go to Sites > Sales Funnels and click on Setting next to your Course Promoter Affiliate Funnel.
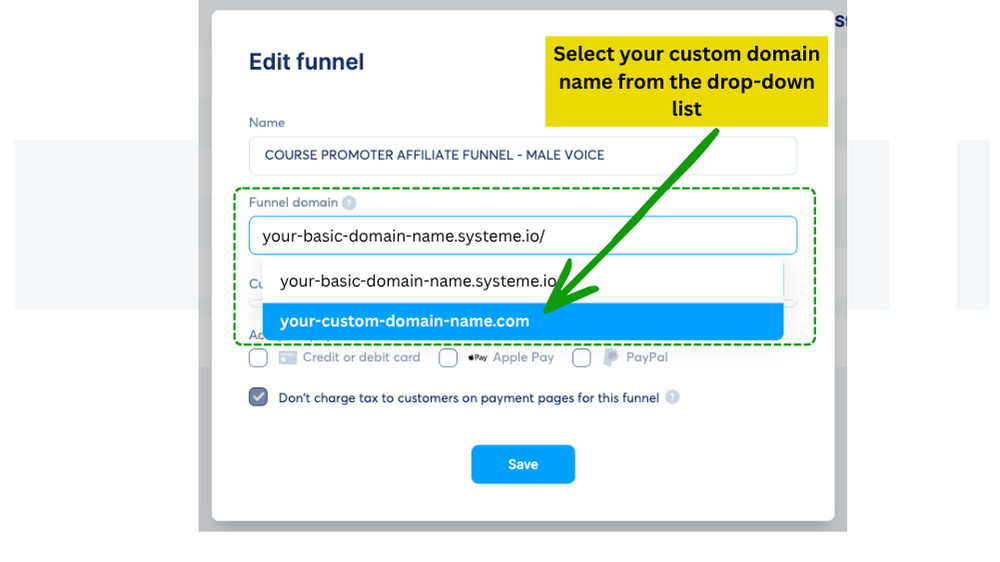
Select your custom domain name from the drop-down list. Click Save when you have finished.
Now that you have set up your custom domain, you will want to direct your audience to your funnel on your custom domain. To do that, you just need to get your new link.
In systeme.io, go to your dashboard and go to 'Sites' then 'Sales funnels'.
Click on your 'COURSE PROMOTER AFFILIATE FUNNEL' then:
1) Select the Optin page
2) Click on the link icon to copy the link to your funnel.
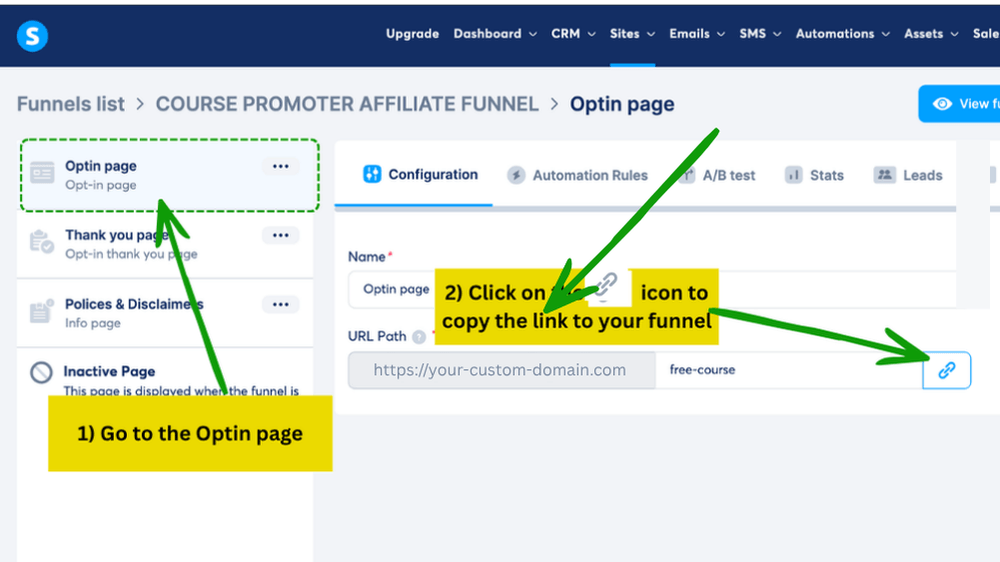
Copy the link to your funnel and free course and save it somewhere you can easily access it. You are now ready to start sending people to your funnel that is now hosted on your own custom domain name.